🏞️ Map Context – Rialto (Escort)
The pivotal moment of the game was the bridge choke point.
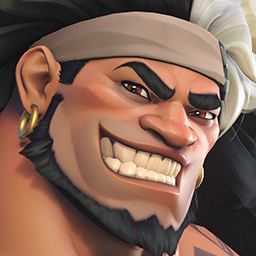
You, as Torbjörn, positioned just off-angle from the main bridge, where your rivet gun had long sightlines and your turret could peek from cover.
🎯 Ultra Long-Range Shots
From your side angle, your primary fire (rivet shots) turned into sniper-level poke.
Enemies (especially Rein and Zarya) had to eat chip damage every time they tried to push forward.
Bastion tried to anchor damage but couldn’t stabilize — your rivets kept whittling him down before Mercy’s heals could recover him.
🛡️ The Bridge Hold
Your turret positioning was perfect: ducked behind cover, but always peeking at the choke.
Every time the enemy stepped onto the bridge, they were immediately:
Pressured by your turret fire.
Sniped by your rivet gun from range.
Exposed to Soldier: 76 poke from the backline.
With this setup, the red team was locked on their side of the bridge for most of the game.
⚔️ Enemy Struggles at the Choke
Reinhardt’s shield (23k mitigation) was impressive, but your constant uptime shots + turret chip wore it down quickly.
Mercy (15k healing) tried to keep Bastion online, but your long-range spam forced her into risky beams — leading to 11 deaths.
Hanzo and Bastion never got space to flank or reposition, since you controlled the angle and sniped the choke repeatedly.
🔑 Why It Worked
Positioning: You didn’t sit in the open — instead you played off-angle, punishing their push from the side.
Uptime: Only 1 death → you were always firing or your turret was.
Choke Control: Rialto’s bridge choke is brutal if held properly, and you owned it the entire match.
🏅 Match Impact Summary
Ultra Long-Range Torbjörn: Rivet spam functioned like sniper shots, punishing enemies before they could cross the choke.
Bridge Domination: Turret + shots from the side locked red team under the bridge almost the entire game.
Final Result: The enemy red team never established momentum — they got sniped at the choke until the game ended.
 Runasapi
 Grandpa

 PlumGhost
 Havana


 MrNastytime
 Oasis
Oasis
 PlumGhost
 Circuit Royal
 Arceus
 Rialto
 rsk
rsk
 New Queen Street
 MǞŊǾŊ
MǞŊǾŊ
 Suravasa
 Kawaiineko
 Shambali Monastery

 MFM2187
 Suravasa
 Kebab
Kebab


